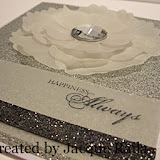
 Here are two little note pad covers I made for my demo friends who attended Regionals with me last weekend. I used this gorgeous Bella Birds Designer Series Paper from the 2009 Spring/Summer Idea Book & Catalog. This paper is just soft and so pretty with Pink Pirouette, Chocolate Chip, So Saffron and Bordering Blue.
I used the chipboard backing that comes in the packages of DSP, and cut it into two 5x7 pieces - one for the front and one for the back of this notepad cover.
TIP: Don't throw that chipboard piece away! It makes a great reinforcing piece for projects like this AND it can also be used with the Big Shot Machine with the steel dies.
I love that my Table Top Cutter slices right through even heavier weight material like this chipboard. I covered both sides of the two chipboard pieces with the Bella Birds DSP, cut to the same 5x7 size. For the front cover, I added some matted pieces of the Bella Birds DSP and the sentiment 'inspire' definition from Define Your Life. Then a coordinating ribbon tab tucked under the front panel to hold a pen.

For the inside of the note pad covers, I added a layer of cardstock to the back panel, adhered only on the very edges with Sticky Strip (strong!) adhesive. Then I tucked in this little 4x6 notepad into the pocket I created. When she uses up all the papers, she can pull it out and add a new notepad!
I bound it at the top with 6 rings from a Bind It All, which cuts the holes and then crimps the binding. Finally, I added a Scissor Charm to the binding. The charm is made from Shrink It plastic, which is a kids craft item. I stamped the circle frame from Frames with a Flourish onto the Shrink It plastic in StazOn Jet Black ink.
TIP: Only use StazOn ink on projects like this, using plastic or metal - Craft or Classic Inks will not dry or remain permanent on non porous materials.
I stamped a monogram letter inside the frame and punched it out with a 1 3/8" Circle Punch. I punched a ring hole with my CropADile. Finally, I used my paper piercer to hold the Shrink It circle onto my work table and heated it with my Heat Gun until it was done - this tiny little charm! I added a cell phone charm string to it and hope that it works as a great identifier for her scissors!
 Stamps: Frames with a Flourish, Define Your Life, Lovely Letters Alphabet, Short Order Alphabet
Card stock: Chocolate Chip, Pink Pirouette, Whisper White, Bella Birds Designer Series Paper
Ink: Basic Black, StazOn Jet Black
Accessories: Pink Pirouette Ribbon, Chocolate Chip Ribbon, Ticket Corner Punch, BIA, Stampin' Dimensionals, Sticky Strip, 1 3/8" Circle Punch, Cell Phone Jump Ring and Charm String


6 comments:
These are BEAUTIFUL, Mary! I feel so honored to have one - I'm using it everyday to keep my "Wish List" of SU supplies in!!
Thanks for all the details in how to make it!
Kay
Truly a beautiful project! Love all the different papers.
Those are soooo ADORABLE!!!
These are beautiful! Thanks for posting the details...
These are awesome! I'm so glad you stopped by my blog and left a comment so I could find yours! I'll be back for more!
Awwww man, now you've just enabled me to "need" and buy a BIA. These projects are gorgeous. You did a fab job!
Post a Comment